Birthday Double Layout
by Tracey Campbell
If you are like me, you will have copious amounts of birthday photos to catch up with! That is why when I saw the Happy Birthday Bundle in the June release, I was super excited to dig right in and find my youngest daughter’s 11th Birthday photos.
When picking the colours for backing the cut files, I wanted to go with bold colours, so I decided to search for primary colours with small patterns or designs on them. I used mainly papers from the You are My Sunshine collection by Bella Blvd, but if you don’t have this collection there are plenty of kits at shopjenniferedwardson.com that will work just as well, like the Celebrate Mega kit, Summer Lovin’ and Endless Summer kit, just to name a few.

There were so many cute elements in the Happy Birthday Bundle that I just had to cut them all out! After I did, I realised that I had enough cut files and photos to make a double page layout!! Now I don’t make double layouts often, so this just goes to show how excited I was to use these cut files.

I started with backing the title “Birthday Girl” and decided on a cute rainbow pattern to set the colourful scene I envisioned.

Moving on to the cake, I used the rainbow pattern in the centre layer of the cake as a feature. Then I filled in the other empty spaces of the cake cut file with primary colours, making it a bold, happy cake to match the playfulness of Paige attacking her “Among Us” cake from her party.
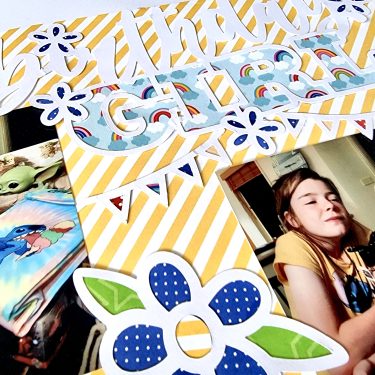
As the title had flowers on it, I knew that I wanted to use more flower cut files, so I used the single flower cut file from the It’s Summer Cut File Bundle and cut it in various sizes to add to the layout.

I don’t know about you, but I love balloons, so the bunch of balloons from the Happy Birthday Bundle just had to go on to the layout. I cut two in the original size and then enlarged one slightly bigger and then backed them with the same colours as the cake.
After backing all these fun elements, I arranged them on to two 12×12 pieces of white cardstock. I used rainbow trimming at the top and bottom of the pages and large rectangle pieces of the same patterned paper I used to back the cut files, blocking out the centre of the cardstock.

I realised after arranging all the pieces that the bottom right-hand corner looked empty, so I went back to the cut files and chose the word “YAY!” from the It’s Summer Cut File Bundle.

I hope I have inspired you to use the Happy Birthday Bundle! We would really love to see it, so TAG us at #jenniferedwardsoncreative so we can leave you some love.
Till next time, hugs.
Tracey.


